Korey Smith, independent film maker, RC model enthusiast and co-owner of MyFirstDrone
WHAT IS THE MAVIC AIR?
The Mavic Air is a confusing drone. It’s not a Mavic 2, but it is better than the Mavic Pro in a lot of ways. If you’re not sure which one to buy, this is the article for you!
We’re going to go over all of the most important aspects of each drone, and at the end, you should have all of your questions answered.
Well.. you should at least have most of your questions answered! I was using a beta version of the DJI Go 4 app and drone firmware, so I wasn’t able to test out every single new feature, but everything important was tested and works just like DJI said it would.
Mavic Pro Design
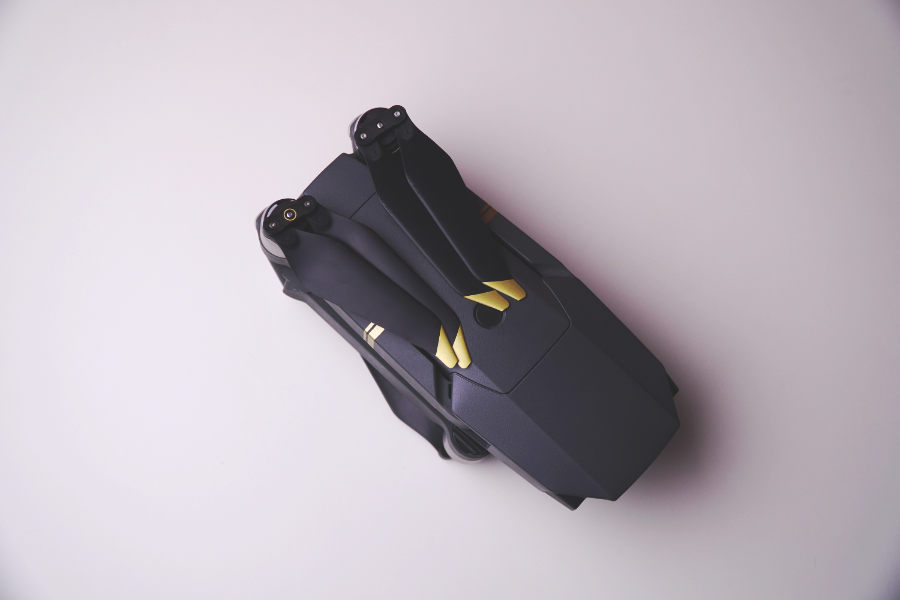
Before getting into the technical stuff, we need to talk about the most obvious difference. The Mavic Pro has a great design. It’s been around for over a year now and it still looks better than most drones in my opinion.
It’s sleek, the build quality is solid, the new Mavic Pro Platinum propellers make it quiet, and the bright lights make it easy to tell what direction you’re facing even when far away.
Even though it’s much larger than the DJI Spark, I would argue that the folding design allows it to fit in more places where the Spark can’t. There are some drawbacks to the Mavic design, and one of them is how large it is when unfolded.
Yes, you can fly it indoors thanks to the vision positioning system and DJI even offers propeller guards if you need them, but it’s scary to fly in small spaces. It isn’t the kind of drone I would try flying through windows or doorways. There’s also a small flaw in the design of the gimbal that makes it more likely to fail if you have a hard landing or crash.
Mavic Air Design
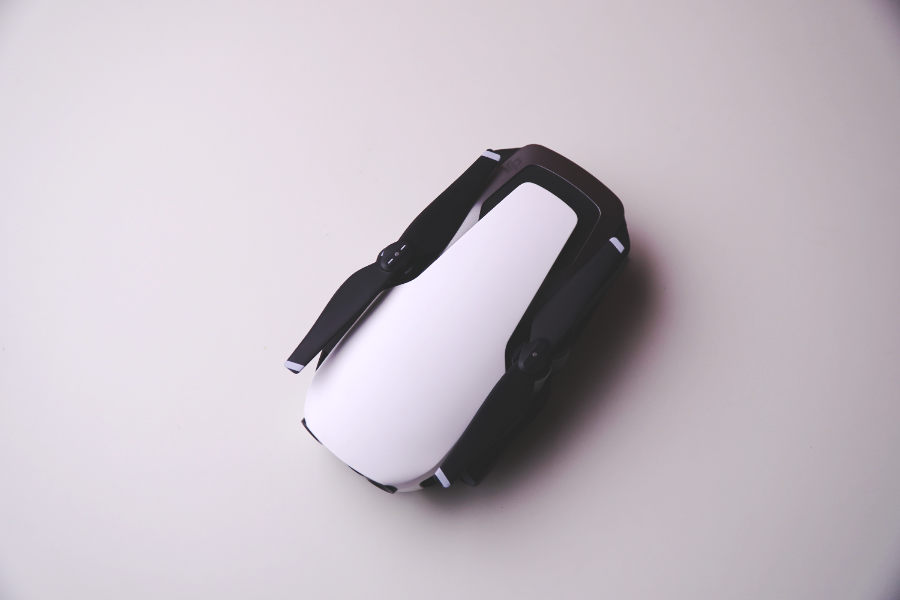
The design of the Mavic Air is completely different from the Mavic Pro. It’s like if you combined the Mavic Pro, the Spark, and a sports car together. It has a very small and clean looking shell like the Spark while still maintaining the folding design of the Mavic Pro.
The lines on the Mavic Air are super clean and well thought out, where as the Mavic Pro looks a bit more robotic and blocky. The best part about the design is the new Spark inspired camera and gimbal. It’s a lot more compact and sturdy.
Although I wouldn’t want to crash any drone, the Mavic Air seems like it would hold up pretty well. One thing that’s strange is the propellers that don’t fold. This might seem like a drawback at first, but unlike other folding drones the props don’t stick out from the body, and the cleaner design probably helps achieve more flight time.
Propellers
The difference between the Mavic Pro and Mavic Air propellers is huge. The Mavic Air has non-foldable 133mm props with a very thin design. If you don’t like the Mavic Air props, there is one other secret propeller option, but that’s a story for another article. The Mavic Pro propellers come in at 214mm and are much wider, however they are only 100mm when folded.
For some people, sound is very important, so here are two high quality audio recordings of each drone. This test was done with the mic held about 3 feet behind the drone and the mic gain set to manual so you can get an idea of what these two drones really sound like. The first recording is the Mavic Air, and the second is the Mavic Pro with Platinum propellers.
The Mavic Air sounds like a swarm of angry bees. It's a similar sound to the Spark. The Mavic Pro sounds more like an airplane. Do to the larger size, it produces a much lower pitch tone that seems quieter. If you get the Mavic Pro Platinum propellers, the noise level will be even lower than the Mavic Air.
Speed
The Mavic Pro will go over 40mph, but so can the Mavic Air. Many people would end the comparison there, but that wouldn’t tell the full story. The max Speed in sport mode is only one measurement, but the real maximum speed will change depending on how you’re flying. This is why we tested the max speed in almost every situation we could think of (not just Sport mode).
In Sport mode both drones go around 40mph. When you are controlling both of them with just a smartphone, there’s a huge difference in speed. The Mavic Pro will max out at 7mph (with obstacle avoidance off and the Mavic Air will do 16mph with APAS enabled. That means the Mavic Air would be a much better choice if you want to just use your phone to fly. When using a controller, both drones go 20mph, but if you disable obstacle avoidance on the Mavic Pro, it will go almost 30mph.
Gimbal speed is another thing that most people don’t talk about. While both drones can go up to 40mph, that doesn’t mean that you will be able to look straight ahead at that speed. The Mavic Pro starts to tilt the camera down at 30mph when going forward, however when you’re flying sideways you can go up to 40 without the gimbal reaching its limit.
The Mavic Air has a gimbal design that is closer to the Spark, and because of that it has a very limited range of motion. You can only go about 20mph in any direction before the gimbal reaches its limit. The only way of going faster while still looking forward is to fly backwards.
Flight time
Flight time is not a very easy thing to measure due to environmental factors, but on the Mavic Pro, hovering indoors we got 23 minutes and the Mavic Air was not too far behind at 18 minutes. Both drones were tested with a battery level of 100% and drained down to 5%. If you spend the extra money on the Mavic Pro Platinum, you can expect to get about 25 minutes of real world flight time.
Video quality
You could have the fastest drone in the world with unlimited flight time, but if the video quality is bad, it’s useless. There are a few different things that have changed with the Mavic Air. Some of these things are good and some are bad.
Colors
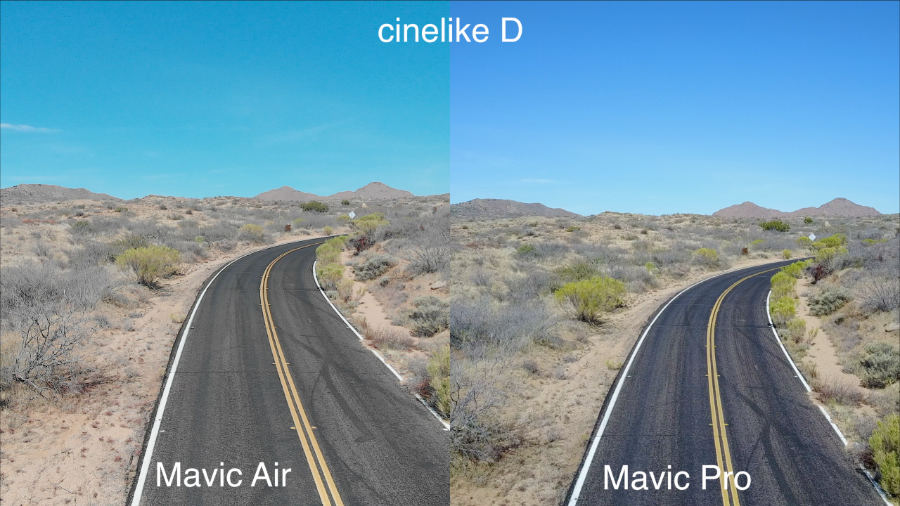
The colors on the Mavic Air appear to be much more realistic than the Mavic Pro. Looking at this photo of a road shot in the Cinelike D color profile, you can see that the Mavic Pro makes the road look more magenta when it should be completely gray like on the Mavic Air.
The auto white balance and exposure on the Mavic Air seem to be more accurate as well. One complaint I have about the colors on the Mavic Air is that it seems to have a slight green tint, but I would prefer that over the purple color on the Mavic Pro. Also when you’re shooting in the normal color profile, the contrast seems just a bit too punchy.
Sharpness
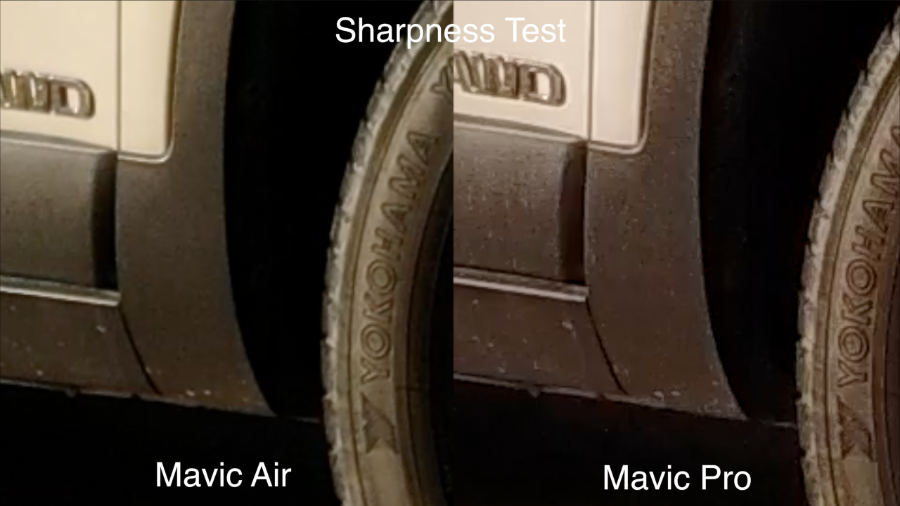
To me, the Mavic Pro seems a bit sharper than the Mavic Air. I’m not sure why this is, but it’s not a huge difference, and I can see more compression artifacts in the Mavic Pro videos. With the Mavic Pro, you also need to make sure that your shots are in focus since the lens doesn’t have a fixed focus distance.
Low Light
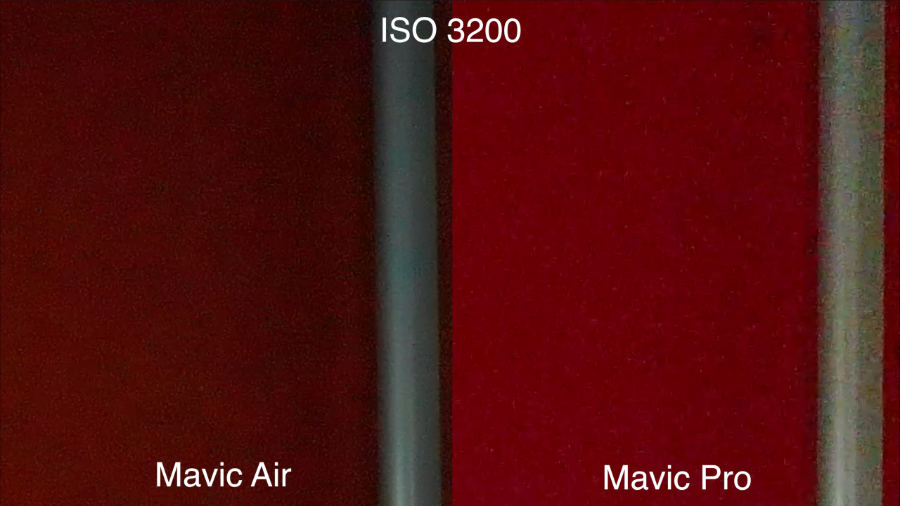
The Mavic Air camera does a lot of things right, but after doing this test, I realized that the Mavic Pro still has some noticeable advantages. At ISO 200, there’s not a big difference other than the white balance (both drones were set to 5000k).
Once you get to ISO 800, that’s where the Mavic Pro really starts coming out on top. At ISO 3200, I wouldn’t consider either of these drones usable, but I noticed something strange with the Mavic Air.
In the Higher ISO ranges, the Mavic Air made the corners of the image darker even though the exposure was set in the same way for both drones.
JPEG And Raw
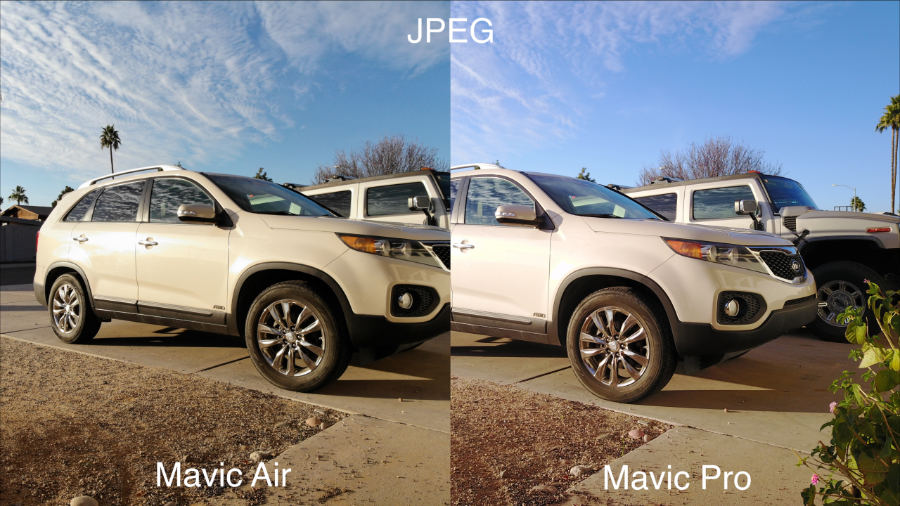
The JPEG Images on both drones look very similar to videos shot in the standard color profile. The Mavic Air is usually a bit green and the Mavic Pro is more purple. Sharpness and compression look identical to my eyes.
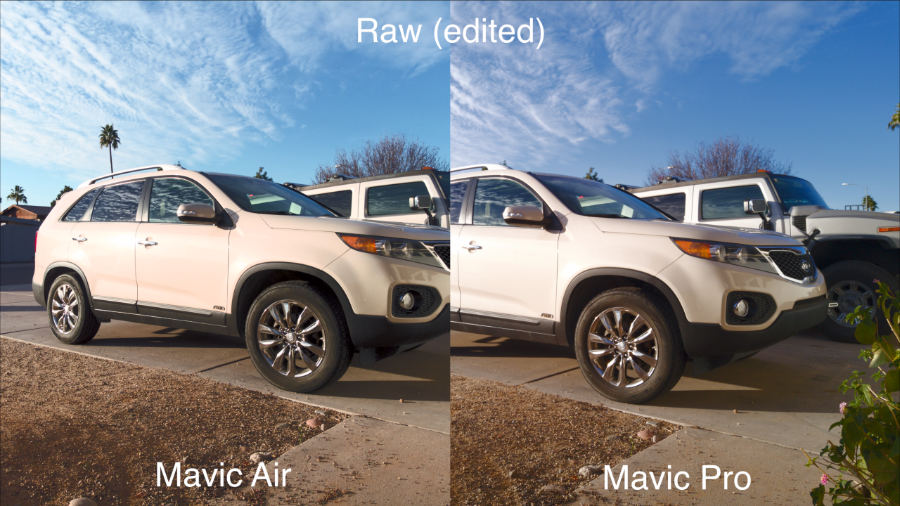
The RAW files don’t start out looking great (no raw files do), but once you do some editing, they definitely come out looking better than the JPEG photos. The Mavic Pro overexposed the raw shot, but since it’s raw, you can fix things like that easily.
HDR Pictures
Ariel photography is not something I do everyday, but if I am taking pictures, I’m usually doing HDR photography. High dynamic range photos can look amazing if you know how to edit them, but before looking at the edited versions, let’s see what the auto HDR pictures look like.
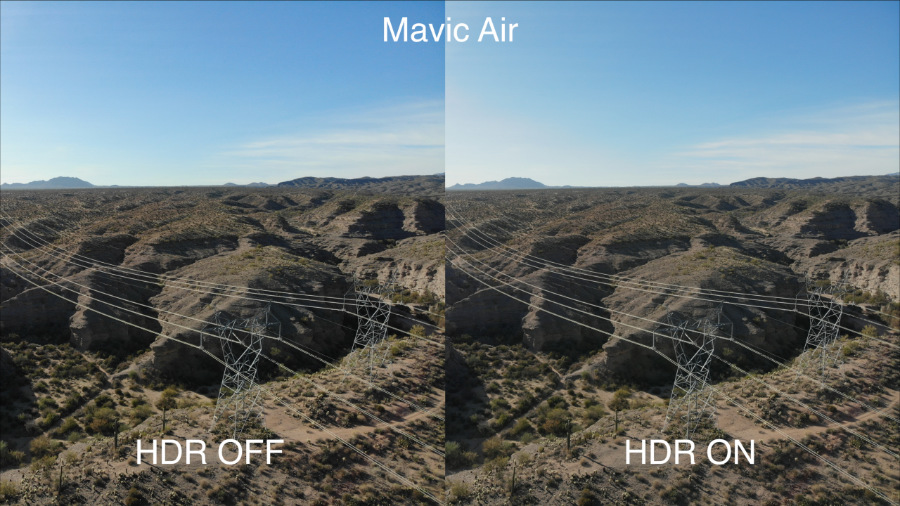
The First image is a side by side comparison between HDR mode and a standard image using the Mavic Air. The HDR mode on the Mavic Air has a much more subtle look than I was expecting. Since the Mavic Air uses newer and more complex HDR algorithms, it probably changes how intense the effect is depending on the lighting conditions, but in this picture, HDR didn’t seem to change the image that much.
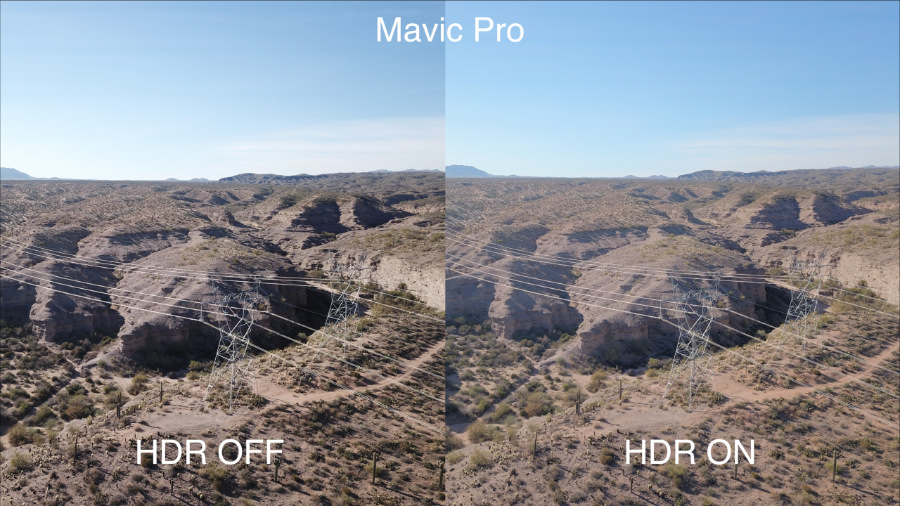
In the picture above, you can see how the Mavic Pro produces completely different results. The HDR shot is much more flat looking and there’s more detail in the shadows. Personally, I don’t like the look of HDR mode on the Mavic Pro. It’s not bad, but I prefer doing things the old fashion way.
There’s another mode called AEB (auto exposure bracketing) and if you really want to get great looking HDR images, this is the mode you should use in my opinion. In this mode, the drone will shoot multiple images at different exposures in your choice of JPEG or Raw. Once you get the photos off of the SD card, you can then bring them into Affinty Photo or Photoshop to create your custom HDR photos. In affinity Photo, I just went into the file menu and selected New HDR Photo Merge. From there, you can add all of the photos you want to merge and hit the go button.
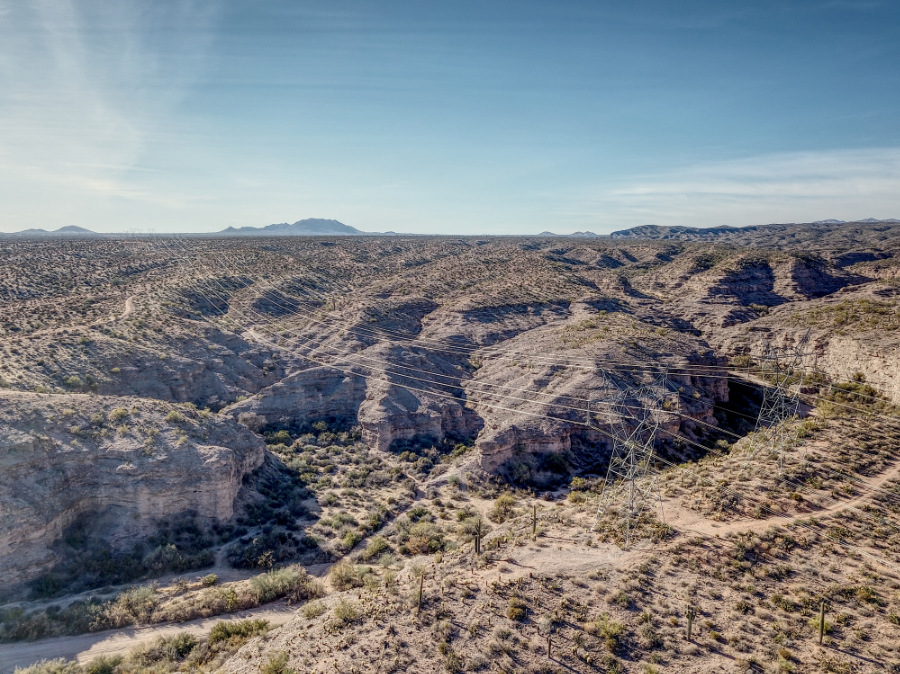
The first image was shot with the Mavic Pro. You can immediately see how much cooler HDR images can look with just a little bit of editing.
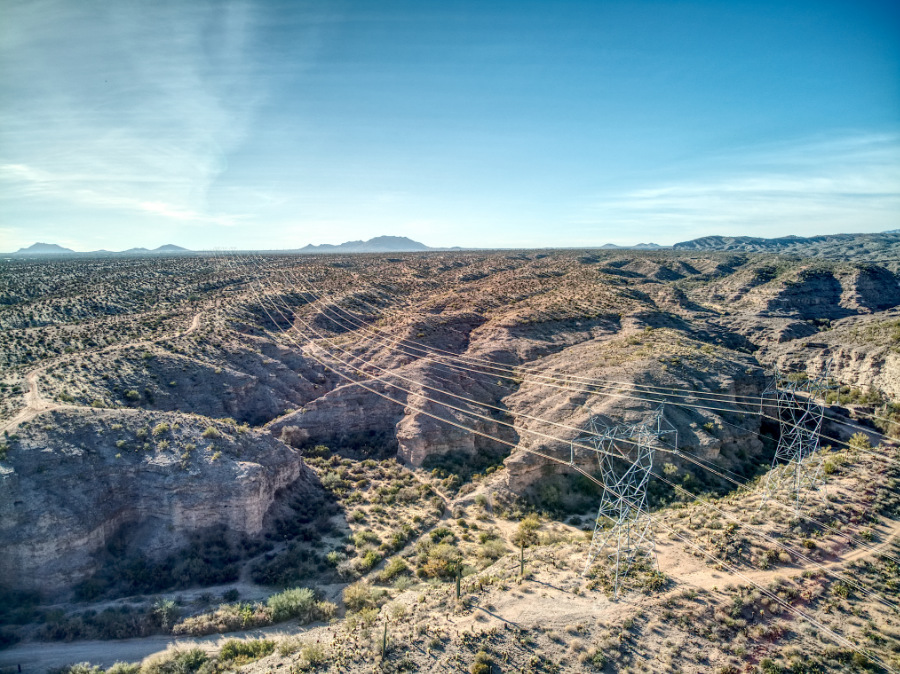
This next image is from the Mavic Air. I personally like how this one came out more than the Mavic Pro. No matter which photo you like better, the point here is that using the AEB mode is a much better option than shooting HDR and letting the drone decide how the image should look.
360 Pano Mode
If you didn’t know, the Mavic Pro has all of the panoramic modes that the Mavic Air has, but there is one big difference. Both drones can shoot 360° panoramic images and you can view them in the app, but the Mavic Pro uses your smartphone to process the images and stitch them together. With the Mavic Air, all of the processing is done using the processor on the drone which allows for a faster and higher resolution panorama.
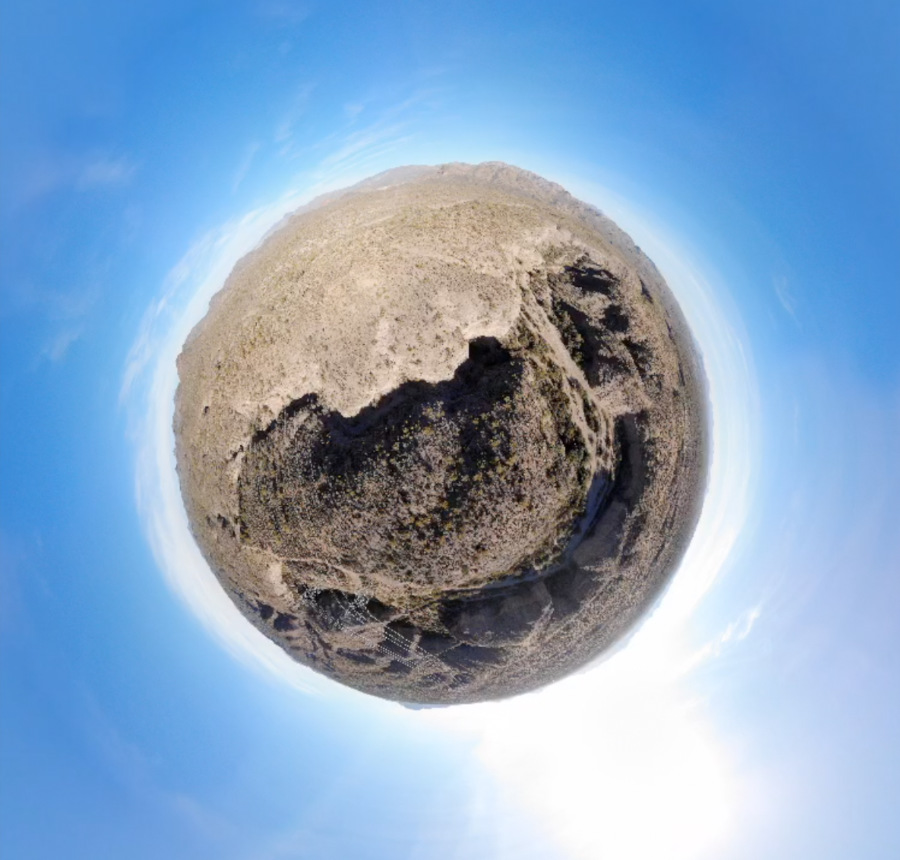
This first panoramic image is an example of what it looks like when you view the panorama in the DJI Go 4 app. The actual photo is just standard image file, but the app uses a technique called Equirectangular projection so you can pan around and view the image as if you were actually there.
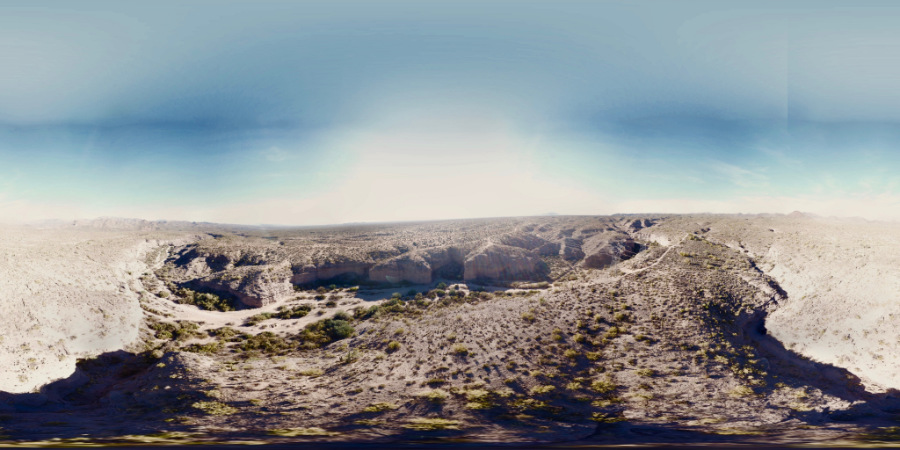
This next photo is from the Mavic Pro. This is what the images look like when you export them into a standard photo program.

Here’s a panoramic shot from the Mavic Air. I’m not sure why, but the Mavic pro overexposed the image while the Mavic Air exposed it perfectly.

The biggest difference between the two panoramic shots is the resolution. On the Mavic pro, you get a 2048x4096 image (just a bit larger than 4K). With the Mavic Air, you’re getting a 4096x8192 image. That’s over 33 megapixels (8K). This makes a huge difference in what the images look like. On the Mavic Air, the resolution is so high that you can crop in and see almost all of the detail that you would in a normal photo.
Obstacle avoidance
The Mavic Pro has two front-facing cameras that it uses for obstacle avoidance. There are also two downward facing cameras for avoiding obstacles while landing. These cameras send data to a special processor on the drone so it can build a 3D map of its environment. Obstacle avoidance on the Mavic Pro is active in almost every mode with the exception of Sport Mode. From my experience, Obstacle avoidance works well. It will sense and avoid anything thicker than a small tree branch, but only when you’re flying forward. If you’re flying sideways or backward, obviously that’s where the sensors will fail.
The Mavic Air has two front-facing cameras just like the Mavic Pro, but it also has two back facing cameras. This means you can now fly backward without fear that the drone will smash into anything! It’s truly amazing that they were able to fit a total of 7 cameras on this drone and still make it much smaller than the Mavic Pro.
Being able to fly backwards with obstacle avoidance is great, but there’s one other new feature that makes the Mavic Air really unique. APAS (Advanced Pilot Assistance System) is a new feature that you can activate on the main flight screen. While flying forward, instead of stopping when an obstacle appears the Mavic Air will fly left, right, or up to avoid it and keep going. So far, APAS has worked every time I use it. Usually, if I try flying it into myself it will go left or right, but if I’m far away and the drone is going faster, it tends to fly up. It seems to fly left or right when it has confidence about what it’s seeing, fly up when it is less confident, and stop if it can’t see what is above the obstacle it’s avoiding. Even though I’ve had drones for more than 5 years and never crashed while flying forward, I still really like this feature. With the Mavic Pro, sometimes I have to turn obstacle avoidance off when flying close to the ground because it will sometimes stop in the middle of a great shot, but with APAS it will just fly up slightly.
Smart Capture (Gesture Mode 3.0)
Did you know that the Mavic Pro has gesture controls? In gesture mode, the Mavic Pro can see you and take pictures when you make a frame with your hands. I know this isn’t very exciting, but it shows that even back when the Mavic came out DJI had big plans for it. The hardware just wasn’t ready at the time. When the Spark came out, using the gesture mode for the first time was amazing, but it still had a few drawbacks and felt like a gimmick.
The Mavic Air is DJI’s third drone with gesture controls, so it’s a bit like gesture mode 3.0 with all new functionality. I guess that’s why it’s now called “Smart Capture” in the DJI Go 4 app.
How To Use Smart Capture
Instead of holding the Mavic Air like you would with the DJI Spark, you place it on the ground and double press the back facing LED light. At this point, You’ll hear a tone indicating that the Mavic in Smart Capture mode. To take off, stand back by about 8 feet so that the camera can see you, then hold your palm out in front of the drone. Once it can see your hand, it will start hovering. To land, you just put your hand out and lower it until the drone starts landing.
Controlling the Mavic Air in Smart Capture mode is super easy. Hold your hand out and it will start tracking you. If you put your hand down and start moving, it will follow you around (just like Active Track). While the drone is following you, at any point you can put your hand up and it will enter into palm control mode. When in palm control mode, you can move your hand in any direction and it will fly there. Another flight related gesture is Zoom. By putting both of your hands out and moving them closer and farther away, you can precisely control how far away the Mavic Air is.
Taking pictures and videos with Smart Capture is also super easy. It also works much better than the DJI Spark. To record video, put your thumbs and index fingers together in the shape of a picture frame. The front LEDs will turn off while recording. To stop the recording, just make another picture frame with your hands and the LED lights will come back on. To take a picture, hold up two fingers (like rabbit ears). The LEDs should flash indicating a 3 second countdown, and then take the picture.
If you’re flying around using Smart Capture and someone else wants to try controlling the Mavic Air, just make sure your arms are down, then have the new user hold their hand out.
The best part about Smart Capture is how fast the Mavic Air responds to your commands. While using palm control, the Mavic Air moves around quickly and precisely. You can move your hands much faster than you could with the spark, and if the drone does lose you, standing in view of the camera and waving your hand will quickly cause the drone to start tracking you again.
If you’re thinking about getting the Mavic Air because of Smart Capture, just do it. The new Gesture mode is no longer a gimmick. Before it was only something I used when I was showing other people features of the drone, but now It feels like something I would actually use. Now if I want to take some quick tracking videos of myself, I can do that, and it doesn’t take forever like it did on the Spark. If you like taking videos and pictures of yourself doing cool things, Smart Capture is definitely a feature you should have.
QuickShots
When DJI released the Spark, they also introduced a new flight mode called QuickShots. This mode allows new drone users to get more complex shots that would otherwise only be possible by a more experienced drone pilot. On the Mavic Air, there are six different shots to choose from. On the Mavic Pro, there are only three. You get Helix, Dronie, and Rocket, but all of the other modes are only available on the Mavic Air.
The first QuickShot is called Dronie. This mode will make the drone fly backward and up at the same time while keeping you in the shot. This creates a slow zooming out look, great for establishing shots that show your viewers where you are.
The next shot is Circle. Like the name implies, this shot will fly in a basic circle around you. The great thing about circular shots is that you can capture them in multiple places, then cut the different shots together in editing software to get cool looking transitions from one scene to another.
Helix is a lot like Circle, but in this mode, the drone will also slowly fly backward while circling you. This creates a much more dramatic looking shot than circle but requires more open space achieve.
Rocket is a more basic shot where the drone flies up while keeping you in the frame. This is probably my least favorite QuickShot mode because it doesn’t look that interesting (in my opinion).
Boomerang is another type of orbiting shot. This mode will fly the drone in an elliptical orbit around you. Just like Helix, it can create really cinematic shots, but also requires more space, so be careful when using it for the first time.
Asteroid is the most famous QuickShot mode. You’ve probably seen it many times before. This mode creates a video that zooms out into a tiny planet effect, then it zooms back in. Asteroid shots can look really cool, but I would recommend not using it all the time or the look will get really old really fast.
Obviously, if you have a lot of experience flying, then the QuickShot flight mode won’t provide much value to you, but for beginners, it’s another good feature to consider. One thing that many people don’t realize is that all of these flight modes work just like Active track. That means you can track more than just people, and the subjects that you track can also be moving at the same time.
The Controllers
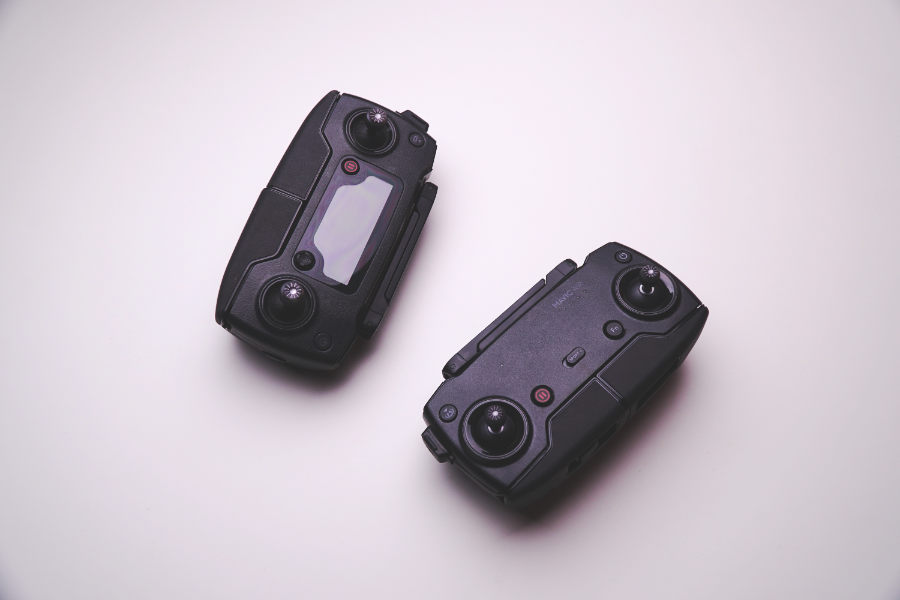
Out of all the differences between these two drones, this is the one thing that made me realize that the Mavic Air is not a replacement for the Mavic Pro. The Mavic Pro controller is just better in every way. The first thing you will notice is that the Mavic Air controller doesn’t have a screen for showing you realtime flight info. This means you can’t have a clean view of your video feed while keeping all of the flight data on the controller. There’s also no exposure dial on the back of the controller, less rubber and metal, and no 5 axis joystick (the thing for controlling DJI Goggles and assigning custom functions).
It’s sad to see all of these missing features on the Mavic Air controller, but there’s something else missing that you can’t see. If you’ve ever used Ocusync on the Mavic Pro, you’ll know that it’s one of the best drone data transmission systems ever. The video feed is always clear, the controls never freeze up, the video feed is 1080p with low latency, and the signal is almost always reliable. With Ocusync, the Mavic controller can also wirelessly connect to DJI Goggles.
With the Mavic Air, you don’t get Ocusync. You get something that is closer to the technology found on the DJI Spark. It’s ok, but you get 720p (not 1080p), there’s more lag, the signal isn’t as reliable, and you have to connect a USB cable to the controller to use DJI Goggles. This doesn’t mean that the Mavic Air controller is bad, it’s just a big downgrade from the Mavic Pro controller and for some people, this could be a deal breaker.
A Real Range Test
When I found out that the Mavic Air didn’t use Ocusync, I was a bit worried that this drone wouldn’t perform how I wanted it to. With the Mavic Pro, you always have a great video feed, and that’s one of the things that allows me to get shots that would otherwise be impossible on a drone like the Spark. After the release, I saw videos of the Mavic Air where people were getting less than a mile of range before the video feed cut out, but they were all flying over cities where there’s lots of radio interference. In most situations, if I need to do a long range flight, it would be done out in the wilderness free of interference (not over a populated area), so for this range test I’m out in the desert where there’s very little radio interference and nothing to crash into.
I started from about 200 feet above the ground and then flew out until the low battery alert popped up. I probably could’ve gone farther, but since I didn’t want to lose the Mavic Air like I almost did with the Phantom 4, I decided to turn around at 10,000 feet. That’s about 3.2km or 2 miles which is farther than I’ve ever had to fly when I’m not doing range tests. With the right wind conditions, I’m sure I could beat the advertised 4km, but honestly there’s no reason to fly a drone that far away. I then did the same thing on the Mavic Pro (not the platinum model) and made it to 15,000 feet before getting the low battery warning. After flying back, I still had a few minutes of flight time, so realistically I could’ve gone all the way out to 18,000 feet or more.
These Drones Did Great. Both of them had near perfect video feeds even at the point where I had to turn around, but while coming back, there was just one small video glitch on the Mavic Air that lasted about a second. It was very minor though.
With the battery life on the Mavic Air, realistically you can fly 1 mile out, hover around for a few minutes while you get some good shots, then fly back with no problem. With the Mavic Pro platinum, I would probably feel comfortable flying it as far as 2 miles, hovering around, then coming back. In any case, you should be happy with the video feed on either of these drones. The Mavic Pro will be better for long range flights when there’s lots of interference, but the video feed on the Air is surprisingly not bad at all.
Yes, the Mavic Pro does have much better DJI Goggles support and a 1080p 60fps live feed mode, but when you’re shooting in 4K, you don’t have access to that feature and many people don’t want to carry DJI goggles around with them.
The Video Lag
DJI didn't really talk much about the new version of WiFi that they're using with the Mavic Air controller, so we did a test to see just how much more latency the Mavic Air has compared to the Mavic Pro, and the results were better than expected. To test the latency, you just record a video of something happening and show the live feed from the smartphone at the same time. On the left you will see the Mavic Air and on the right the Mavic Pro.
Based on this test, The Mavic Pro latency is about 130ms and the Mavic Air is 170ms. These are just rough estimates, but they do show that there’s not a big difference between the two video feeds. To be honest, I was expecting much more lag do to the WiFi link on the Mavic Air compared to Ocusync. We also tested the video latency on the DJI Spark and the results were much worse. All of this means that the Mavic Air does have a much faster video feed than the spark, but the Mavic Pro still comes out on top.
Phone control
If you’re always using the Mavic Pro controller, the Mavic Air controller will feel like a downgrade, but what if you don’t use a controller at all? What if you just want to use your phone?Smartphone control on the Mavic Air is amazing. The signal strength is much better than the Mavic Pro. I can fly over 300 feet away in a densely populated area and still have an ok connection. While doing the same thing with the Mavic Pro, I could only get about 100 feet before the signal became unusable. You also have to remember that the maximum speed when using your phone is 7mph on the Mavic Pro and 20mph on the Mavic Air.
